Dynamic link preview images using Lektor, a static site generator
Contents
Have you ever noticed that when someone links to a New York Times article or GitHub repository on Twitter or iMessage, you see a nice card with a title, description, and an image instead of a simple link?
For journalistic publications like the New York Times, the featured image is typically a photograph from the article. GitHub dynamically generates an image displaying stats about the linked repository.
 GitHub does a nice job of generating a useful preview image
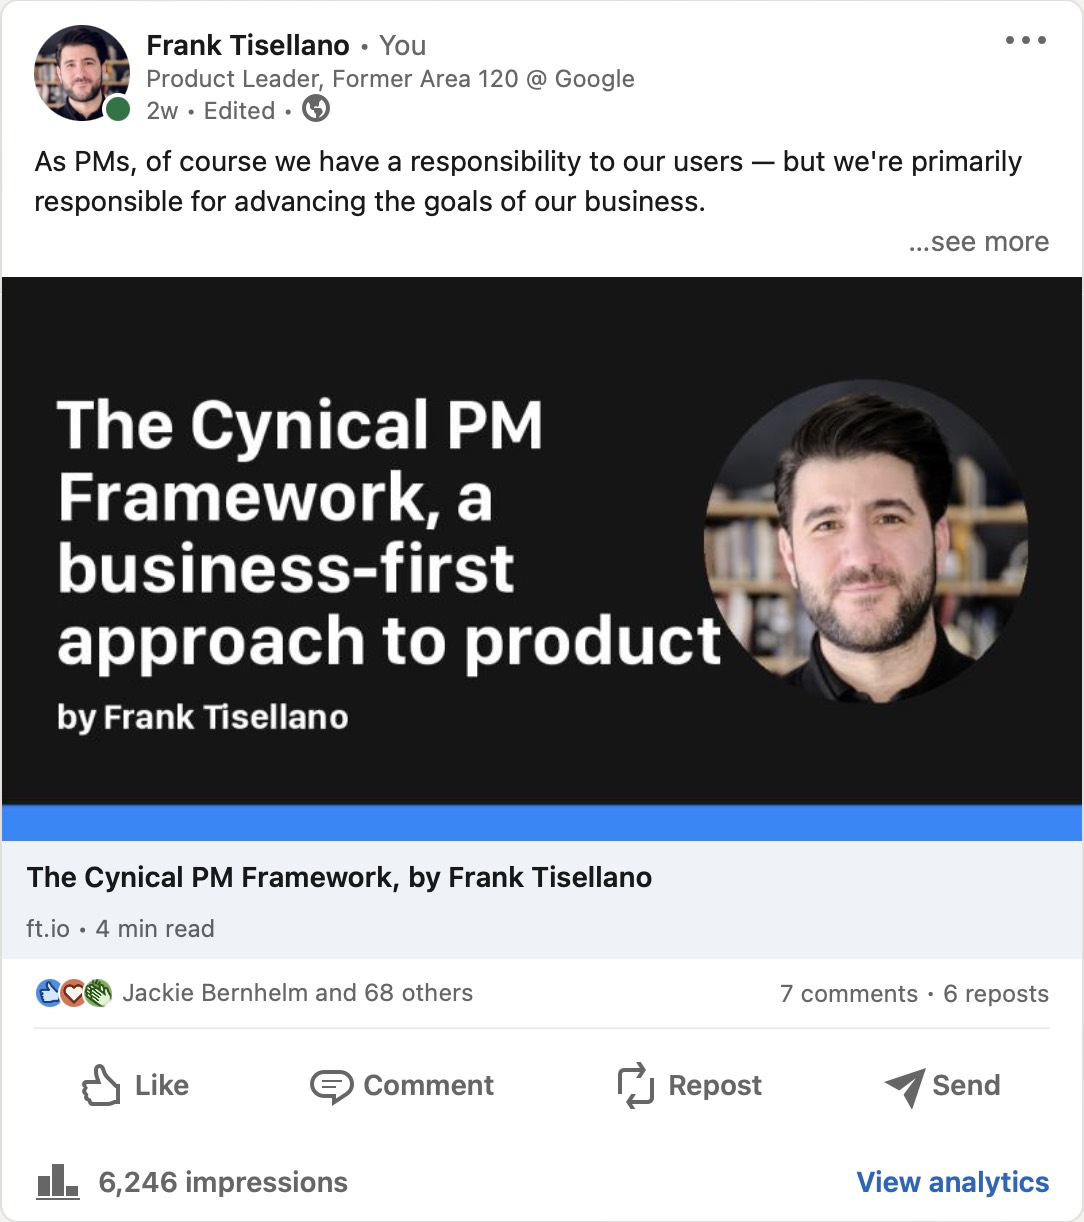
When I first attempted to publish my Cynical PM Framework article on LinkedIn, LinkedIn automatically pulled in a pixelated version of an image from the article that wasn’t representative of the whole piece. It looked bad.
But I liked having some kind of image. At first, I used an all-blue rectangle just to have something in place. After that, I considered making a custom image for every post but decided it’d be too cumbersome. Now that I have some free time, I figured I could create a more dynamic solution.
The Plugin
The result? A plugin for Lektor, the static site generator that powers this site. It generates link preview images like this for every blog post and several other pages, automatically, at build time:

Thanks to a ton of help from one of Lektor’s core maintainers, the plugin generates a new link preview image whenever there’s an update to a page that should have an image.
Images are dynamically generated at build time, so they aren’t stored in the git repo, which makes publishing more convenient because I can edit articles anywhere, commit, and know the images will be built by Netlify’s build system.
As far as I’ve been able to find, this is the first link preview image plugin for a static site generator, and I don’t often get the chance to write code for my day job, so I’m quite proud of it! That said, I’m not sure it’s ready for publication to the Lektor plugin directory, but if you’re a Lektor user and would like to try it out, shoot me a note.
Want to see what they look like? Share this post on Twitter! :)
The Nerdy Details
If you don’t use Lektor, this section will be a bit boring for you. But Lektor is awesome and super underrated, so you should try it out.
Hooking into Lektor
The plugin’s goal is to generate an image so I can reference it in <meta> tags for OpenGraph and Twitter in the <head> of the page, like so:
<meta property="og:image" content="imageurl.png">
<meta data-rh="true" property="twitter:image" content="imageurl.png">
Before getting help (thanks again, Jeff!), the plugin hooked into Lektor’s before-build-all event, naively regenerating an image for every single blog post before every build, which means it needed a local environment to build and commit the images for each page before publishing.
In its current incarnation, it declares a global Jinja template variable (Lektor uses Jinja for templating) called imessage_preview(), which, when called from a page template, regenerates a new image for a page only when the page is updated. Efficiency!
What’s neat about this implementation is that it’s super easy to define when a page should have an image generated for it — simply include {{ imessage_preview() }} in its template.
Otherwise, the plugin doesn’t do anything particularly interesting with respect to Lektor. It does, however, do a few fun things using PIL. Let’s explore!
Generating an image using PIL
I’ve never written Python code before, let alone using the PIL library, so I was a bit intimidated, but after a lot of trial and error, I’ve landed on an image generation technique that works pretty well for my purposes.
I won’t bore you with the entirety of the code here, but here are a few bits I found challenging or interesting.
Looking at the preview image above, you’ll see that it includes a circular headshot photo to add some visual flair. PIL is a relatively low-level library, so resizing and masking the headshot image to a circle took a number of steps.
# Define the size tuple for the headshot in its final position
hs_size = (360, 360)

# PIL's L mode generates a black and white image
hs_mask = Image.new('L', hs_size, 0)

# Set up a drawing context
hs_draw = ImageDraw.Draw(hs_mask)

# Draw a white ellipse onto the square
hs_draw.ellipse((0, 0) + hs_size, fill=255)

hs_original = Image.open(headshot)

# Fit the headshot into the mask and center
hs_output = ImageOps.fit(hs_original,
                         hs_mask.size,
                         centering=(0.5, 0.5))

# Replace the alpha layer in the headshot with the mask
hs_output.putalpha(hs_mask)
Once we’ve got a nicely masked headshot (another piece of code inserts it into the final image), we need to draw the title and author name. Again, PIL is pretty low level, so I needed to lay the text out manually, in steps.
First, Python’s textwrap module splits the title into multiple lines. Then, using the number of lines and a known line height, we lay out each line one at a time, starting from a vertical position that, when all the lines are drawn, centers the entire rectangle containing the title relative to the center of the image.
The plugin also takes the height of the author name and the bottom accent border into account, but I’ll leave those out here for simplicity:
num_lines = len(title_split)

# Divide overall image height by 2 to get its center,
# then multiply the number of lines in the title
# by half of the height of the line in order to shift
# our starting point such that the center of the title
# is the center of the image
title_padding_top = round((overall_height / 2) - (num_lines * (h1_size / 2)))

# y_offset_basis functions as the line height here
y_offset_basis = h1_size

# Set our initial y_offset to the padding we
# calculated above
y_offset = title_padding_top

# Add some line spacing to make it look nicer
line_spacing = 30

# Draw the title
titledraw = ImageDraw.Draw(image)
for line in title_split:
    titledraw.text((image_padding_left,
                    y_offset),
                    line,
                    font=h1_fnt,
                    fill=text_color,
                    stroke_width=5,
                    stroke_fill=background_color)

    # After we're done drawing a line, shift down
    # by increasing the y_offset by our text size
    y_offset += y_offset_basis

# Draw the author name
titledraw.text((image_padding_left, y_offset + line_spacing),
                subtitle,
                font=h2_fnt,
                fill=text_color)
If the title is more than five lines long, the plugin simply truncates it and adds an ellipsis at the end of the last line. For now, I’m taking that as a constraint on title length, so none of my images have ellipses in them. If this becomes too restrictive, I’ll update the plugin to appropriately shrink the text size and deal with the shrinkage to maintain a harmonious layout.
The Satisfaction
All in all, it’s been incredibly gratifying to make something from a bunch of new-to-me technologies, even if few will see the fruits of it. As a result, I’ve developed a small amount of comfort with Python, I’ve learned a lot about Lektor’s plugin system, and I’ve gained renewed excitement around fiddling with my personal site, my playground.
If you’ve read this far, I really appreciate your time. Thanks for coming on this little journey with me. If you have any questions about making Lektor plugins or would like to try this one on your own site, please do reach out. Happy to do my best to help.